For many years I have wanted to be one of the diners at RTE's The Restaurant. Having applied many times this year was the first time I had the detailed phone interview with Lisa- a researcher with RTE. At first, I was slightly nervous but I soon realised that I could answer any of Lisa's questions and by the end of the telephone conversation I felt like I was merely having a chat with someone who shared a passion for food. She has the difficult job of combing through thousands of applicants to find 32 diners for each show. Maitre'D John made us aware of how lucky we were to be 'the chosen ones'!


Here I am with my fellow diners my sisters Fiona and Dervilla. Before we got near a dinner menu we were seated in the lounge area of The Wineport where wine was free-flowing. Unfortunately, we were one of the last tables to get seated so we had almost 2 1/2 hours here. We didn't mind as we were excited about the prospect of getting seated and the time passed easily by chatting with other diners and watching the crew putting everything in its place for the show!


John Healy, the Maitre'D, giving the diners advise on what to say and more importantly not to say while on camera. His relaxed nature was quite calming for any that were beginning to feel a little 'camera shy'! His good humour and witty comments had everyone in stitches!


I must say that I wasn't terribly impressed with my meal but I wasn't disappointed either. We knew that the show was being filmed as a cook-off. On reading the menu we were sure that it must be a 3-star cook-off but after having the meal we were more convinced that it could be a 2-star cook-off. To our amazement(and the critics) it was a 5-star cook-off. However, there were some good elements to the menu. Amanda Brunker (pictured below) was one of the chefs and even though her menu didn't win, our table actually preferred her choice of dishes. Her starter of scallops was fairly standard but delicious none the less! I enjoyed her Beef and Guinness Pie but again it wasn't extraordinary however I found her Mille Feuille dessert with Rhubarb and custard served with a ginger ice-cream overly sweet.

Fintan O' Toole was the other celebrity chef and even though he won the cook-off I would find it hard to compliment any aspects of his menu. He served his butternut squash soup (which was fairly nice) with game livers on toast. I'm neither a fan of game or livers and served this way would not encourage me to eat either in the future! His main was smoked mackerel and pork belly with beetroot and horseradish- all perfectly fine but it wasn't a combination that I particularly liked. Fintan's dessert was a baked Toblerone cheesecake which sounds luscious but I found it to be fairly flavourless.
Even though we weren't blown away by the food the whole experience was fantastic. The staff and the team behind The Restaurant were all so friendly and each was eager to make sure all diners were enjoying their night out. It certainly would make one would feel like they were in a very well run restaurant and not on a television set!


It was a real pleasure to meet Tom Doorley. He was warm and eager to engage in conversation with any interested diners. Earlier that week he had sent out a tweet looking for a recommendation for lunch. I suggested that he and Paulo should try The Fatted Calf in Glasson. This charming restaurant also impressed Tom and Paulo and both gave The Fatted Calf rave reviews in that weekends' papers.


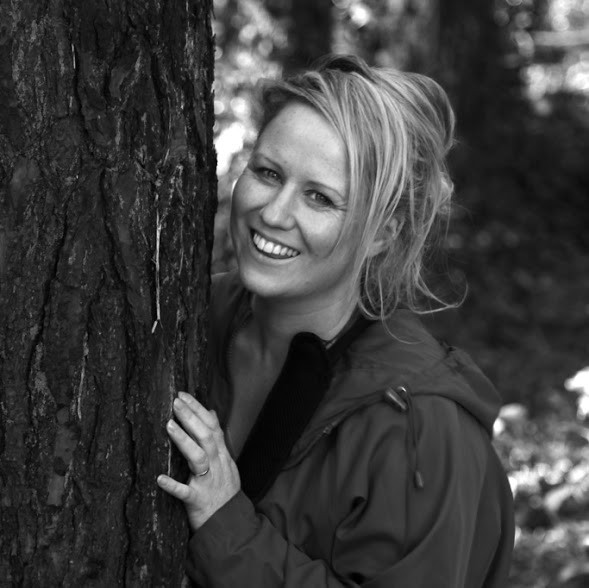
Louise Lennox is as bubbly and friendly off camera as she appears on camera even after a long day in the kitchen. For a lady who self admittedly loves her desserts she is tiny!!!!


If you missed the show it will be on RTE Player until January 19th - The Restaurant- 5 star Cook Off

RTE accept applications all year round and contact the lucky diners a few weeks before filming. If you would like the chance to enjoy a meal at The Restaurant CLICK HERE and submit an entry. Good Luck!!!


Like many Irish, I have been wishing for a White Christmas for many years. Dashing through the snow and Walking in a winter wonderland all sound quite dreamy, and look extremely tempting on a music video, however after a day or two of being house bound, and the hardship that these extreme temperatures bring, the dream of snow soon turns into a nightmare for many!!


Admittedly the snow makes the otherwise bland winter countryside look simply amazing. Snow is an ideal canvas for the keen photographer. Therefore I had to try to capture a few foodie pictures out in this ready made photo shoot.
My eldest boy Jack recently saw Nigella Lawson make these Christmas Biscuits and decided that they would make the perfect treat for Santa. They were very easy to make and tasted really yummy. Jack now has his own blog with plenty of kid-friendly recipes. He has gone to the extra effort of putting a video clip of Nigella demonstrating these biscuits. I'm very proud of this young man- check out his blog iJack O D.

The boys decorating the biscuits- a messy combination -boys and melted chocolate!


Ingredients
250g soft butter
150g caster sugar
40g cocoa powder
300g plain flour
½ teaspoon bicarbonate of soda
1 teaspoon baking powder

For The Festive Topping
2 x 15ml tablespoons cocoa powder
175g icing sugar
60ml boiling water, from a kettle
1 teaspoon vanilla extract
Christmas Sprinkles
Smarties (optional)

Method
1. Preheat the oven to 170̊C/ gas mark 3 and line a cookie sheet with parchment paper.
2. Cream the butter and sugar in a bowl and, when you have a light, soft whipped mixture, beat in the 40g cocoa powder (sifting if it is lumpy) and, when that's mixed in, beat in the flour with the baking soda and baking powder. Or just put everything in the processor and blitz, if you prefer.
3. This mixture is very soft and sticky so roll about a tablespoon full into balls, then slightly flatten into fat discs as you place them, well spaced, on your cookies sheet. You should get about 12 on at a time.
4. Bake each batch for 15 minutes; even though the cookies won't feel as if they've had enough time, they will continue to cook as they cool. They will look slightly cracked.
5. Move the cookie sheet to a cold surface and let it sit for 15 minutes before transferring the cookies to a wire rack, with a sheet of newspaper under it (to catch drips while topping them).
6. To make the topping, put the cocoa powder, confectioners' sugar, water and vanilla extract into a small saucepan and whisk over a low heat until everything is smoothly combined. Take off the heat for 10 minutes.
7. When the cookies are cool, drizzle each one with a tablespoonful of chocolate glaze—it will help "glue" the sprinkles on in a minute. Use the back of the spoon to help spread the mixture, though an uneven dribbled look is part of their charm.
8. After you've iced 6 cookies, scatter with some of the Christmas sprinkles and continue until all the cookies are topped. If you ice them all before sprinkling, you will find the cocoa "glue" has dried and the sprinkles won't stick on.
For an alternative topping just melt some milk chocolate and drizzle over each biscuit then top with some smarties.


b

The Noric Diet is the latest cookbook from Trina Hahnemann. I have been reading though it and trying out some of the recipes over the past couple of weeks and I must say that it has proven to be a rather good read. As you may of gathered from my blog 'low fat' dishes don't often make an appearance here, however I am ever conscience of eating food that ultimately benefits our health. My one downfall with 'low fat' food is that I often find these dishes to be not only low in fat but also low in flavour. This was not the case with the recipes in this cookbook. I tried a number of Trina's recipes and I must admit I was pleasantly surprised.  I tried out the shower buns (pictured above and below) which were completely effortless. The ingredients are mixed together and left in the fridge over night and the following morning little moulds of dough turn into delicious, healthy, fresh,  homemade bread rolls. I also made the Spelt pancakes with blueberries and the Raspberry lime sorbet - both were very easy to prepare and tasted delicious!


I found this book extremely refreshing as this is much more than just a healthy living cookbook but more of a guide to a healthy way of life. Trina offers really practical lifestyle advice with many delicious recipe to back up her plan.  The photography is beautiful and very encorging to even a novice chef. My only criticism of this book would be that many of the recipes include fairly elaborate ingredients for the home chef. That said each ingredients is highlighted for it's health benefits and if you are starting a new healthy living regime it is more than likely necessary to swap some of your store cupboard ingredients with a healthier alternative.
If, like me, you begin each year with the resolution to a healthier year then this is one book which may just help you to achieve this. We all know that what we eat is crucial and Trina claims that through this book you can eat your way to health and happiness. I intend on putting this book to good use and will try to follow the Nordic Plan in the New Year ( once all the Christmas chocolate is gone out of the press!!!).


We have a plentiful supply of Butternut Squash in the house at the moment as it is currently Millie's favourite baby puree. It is such a deliciously sweet veg that it makes the perfect introduction to the veggie world for a little one!
At this time of the year there are so many 'colds' and 'flus' hanging around in the air. More than ever you should try to stock up on some extra nutrients to help guard you against these seasonal bugs!! There are certainly many good reasons to incorporate Butternut Squashes into your diet. This Super Veg is packed with wonderful health benefits. They have a significant amount of potassium, Vitamin B6 and Folate. They are also low in fat, high in fibre and one portion provides you with half of the recommended daily dose of Vit C.
One of the best ways to cook a Butternut Squash is to roast it, then mash it, puree it for soup, add it to pasta or risotto or I would often just serve the roasted squash as is!!
This is a simple recipe which makes a nice change from the veg you may normally serve with a meal.


Ingredients
1/2 Butternut squash
6 cloves garlic
2 tbsp rapeseed oil/ olive oil
1 teasp corriander seeds, crushed
1/4 teasp chilli powder
1 teasp smoked paprika
sea salt
freshly ground pepper

Method
1. Chop the butternut squash into even sized cubes.
2. Combine the coriander seeds, chilli powder and smoked paprika with a pestle and mortar.
3. Place the squash in an oven proof dish and sprinkle over the spice mix.
4. Drizzle over the rapeseed oil/olive oil to evenly coat the squash. Mix well and sprinkle with a little sea salt and some freshly ground pepper.
5. Bake in a pre- heated oven at 180 c/ 350 f for 30- 40 mins until the squash is soft but still has a bit of a bite.


Chocolate fondant has to be the ultimate chocolate lovers dessert! A hot pudding that has a molten middle makes it completely irresistible. This fondant is a basic recipe but if you would like to vary the taste, a splash of Baileys can be added to the melted chocolate. A chocolate orange version would also be delicious by adding the finely grated zest of an orange and a shot of orange liqueur. I normally make fondants with chocolate that has 70% cocoa solids however to make them a little less rich I recently used a combination of 70% with 46% - (that I bought in Lidl) and the result was a little lighter but still very luscious.

The beauty of this extravagant dessert is the fact that it can be made well in advance as they are better if allowed to rest for a few hours before cooking. Once in the ramekin the uncooked fondant will sit happily in the fridge overnight or can be frozen for up to 1 month. To bake from frozen add 5 mins to the cooking time. Once cooked the fondant should be soft in the centre but able to hold their shape. Always test one and if it collapses simply cook for a couple more minutes.

It has to be said that this dessert is a little bit tricky however I have a few tips for you to follow which will result in a flawless fondant.

1. To ensure the puddings don't stick it is essential to have the ramekins prepared properly. (See pics below)
2. Always make a few more than you need to allow for testing if the fondants are perfectly cooked.
3. This recipe makes 10-11 fondants. Someone has to do the 'taste test' so why not make the mixture the day before you need them and test 2 out in your own oven to see exactly how long they take to cook. Mine were 13 mins but this may vary according to your ramekin size and if there is something else in the oven.


Ingredients
50g melted butter, for brushing
Cocoa powder, for dusting
200g good-quality dark chocolate, chopped into small pieces
200g butter, in small pieces
200g golden caster sugar
4 eggs and 4 yolks
200g plain flour

Caramel sauce

250g caster sugar
142ml pot double cream
50g butter

Method

  1. First get your moulds ready. Using upward strokes, heavily brush the melted butter all over the inside of the pudding mould. Place the mould in the fridge or freezer. Brush more melted butter over the chilled butter, then add a good spoonful of cocoa powder into the mould. Tip the mould so the powder completely coats the butter. Tap any excess cocoa back into the jar, then repeat with 1 the next mould.
  2. Place a bowl over a pan of barely simmering water, then slowly melt the chocolate and butter together. Remove bowl from the heat and stir until smooth. Leave to cool for about 10 mins.
  3. In a separate bowl whisk the eggs and yolks together with the sugar until thick and pale and the whisk leaves a trail; use an electric whisk if you want. Sift the flour into the eggs, then beat together.
  4. Pour the melted chocolate into the egg mixture in thirds, beating well between each addition, until all the chocolate is added and the mixture is completely combined to a loose cake batter.
  5. Tip the fondant batter into a jug, then evenly divide between the moulds. The fondants can now be frozen for up to a month and cooked from frozen. Chill for at least 20 mins or up to the night before. To bake from frozen, simply carry on as stated, adding 5 mins more to the cooking time.
  6. Heat oven to 200C/fan 180C/gas 6. Place the fondants on a baking tray, then cook for 10-12 mins until the tops have formed a crust and they are starting to come away from the sides of their moulds. Remove from the oven, then leave to sit for 1 min before turning out.
  7. Loosen the fondants by moving the tops very gently so they come away from the sides, easing them out of the moulds. Tip each fondant slightly onto your hand so you know it has come away, then tip back into the mould ready to plate up.
  8. Starting from the middle of each plate, squeeze a spiral of caramel sauce - do all the plates you need before you go on to the next stage.
  9. Sit a fondant in the middle of each plate. Using a large spoon dipped in hot water, scoop a 'quenelle' of ice cream. Carefully place the ice cream on top of the fondant, then serve immediately. Repeat with the rest of the fondants.
For Carmel Sauce
  1. Tip the sugar into a heavy-based frying pan, stir in 4 tbsp water, then place over a medium heat until the sugar has dissolved.
  2. Turn up the heat and bubble for 4-5 mins until you have caramel - a light golden brown colour. Watch this very carefully as the sugary mix can turn from a light golden colour to burnt caramel very quickly. Take off the heat, then carefully stir in the cream and butter. Leave the sauce to cool, then pour into a squeezy bottle.
  3. This sauce will keep for at least a week in the fridge.


On the first Friday of each month enthusiastic cooks from around the country are united around a virtual dining table where they all prepare and cook a meal centered around a particular theme. This is known as the Irish Foodies Cookalong. November's theme was quite appropriately 'winter warmers' and with so many recipes to choose from the possibilities for me were endless. Eventually I decided to cook a good old Chilli- perfectly suitable for cold weather and has the ability to heat you up in more ways than one!
I had seeen Nigella adding some dark chocolate to her Chilli Con Carne and it looked delicious. I based this recipe on Nigella's version substituting kidney beans for chick peas. This was a good tip given to me by my friend Erika who found the latter was better received by kids!! I found the addition of Guinness really complements the spicy flavours quite well. As with most hearty stews this tastes even better the day after cooking and freezes well.
If like me you are currently housebound due to snow why not make a big pot of chilli, freeze it and enjoy a cook free day over the Christmas holidays!!


Spiced Chocolate Chip Chilli

Ingredients
150g chorizo
900g/ 2lbs shin of beef cut into three quarter inch cubes
2 large onions
3 cloves garlic
1 long red chilli, seeded
rapeseed oil/ olive oil
1 teaspoon ground cumin
1 teaspoon ground coriander
1 teaspoon ground cinnamon
2 tbsp tomato puree
2 tbsp tomato ketchup
1x400g (14oz) tin chick peas
2x 400g (14oz) tin chopped tomatoes
1 tbsp sugar
25g dark chocolate chips
250mls Guinness
100mls water (swilled out in the chopped tomato cans)

Method
Preheat the oven to 150c/325F/gas 2.
1.Finely chop, or process the onion, garlic and chilli. Heat the oil in a large pan and fry this mixture until soft, add the cumin, coriander and cinnamon.
2. Stir the oniony-spiced mixture together and then add the sausages sliced into eighth-inch coins.
3. Drop in the cubes of beef turning them in the pan with the sausages to brown the meat.
4. Stir in the tomato puree, tomatoes, ketchup and drained chick peas.
5. Add the guinness and water and bring the chili to a boil, sprinkle over the chocolate and stir it all together. 6. Season with salt, pepper and sugar. Once simmering cover the pan with a lid.
6. Put the chilli in the oven and cook for 3 hours. Once cooked it is best left overnight as the flavour improves.

To serve
Creamy mashed potatoes or Basmati Rice
Grated Chedder cheese- sprinkle over before serving
Sour cream (to cool things down!) - a dollop on the side